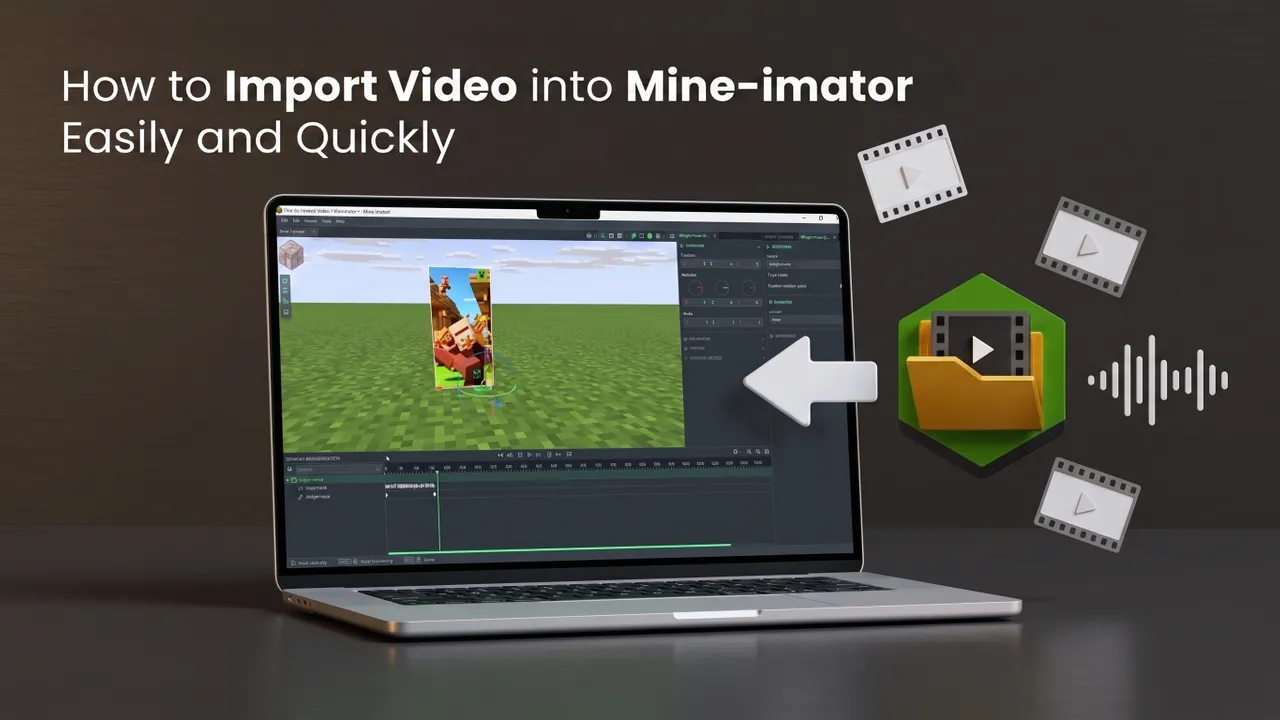
Inserting a video into a Mine-imator animation project is often considered difficult due to the limitations of the application’s built-in features. Typically, other methods scattered across the internet require you to manually convert video files into images, import those images one by one, and set up keyframes manually—a tedious and time-consuming process.
However, you can now import video into Mine-imator much more easily and quickly. This method automates the entire process so you don’t need to manually convert videos, import images one by one, or configure keyframes. In fact, this import method is so automated that it can even include audio automatically during the import.
This method is extremely useful for animating TV screens, computer monitors, or billboards inside the Minecraft world to make them look much more alive. Additionally, it is highly beneficial for animators who want to trace or follow dance movements, allowing them to view the reference video directly within the same viewport for easier synchronization (sync). You can also use it simply for adding visual effects.
Practical Steps to Import Video into Mine-imator
Before starting, make sure you have prepared the video file you want to insert into your animation. After that, follow the step-by-step instructions below in order.
-
Opening the Tool
Visit the free web-based conversion tool called Mine-imator Video Importer via the button below, then click the button labeled Launch to enter the main workspace page. -
Uploading the Video File
Click the Browse button to search for the video file on your computer, or simply drag and drop the video file directly into the center of your browser screen.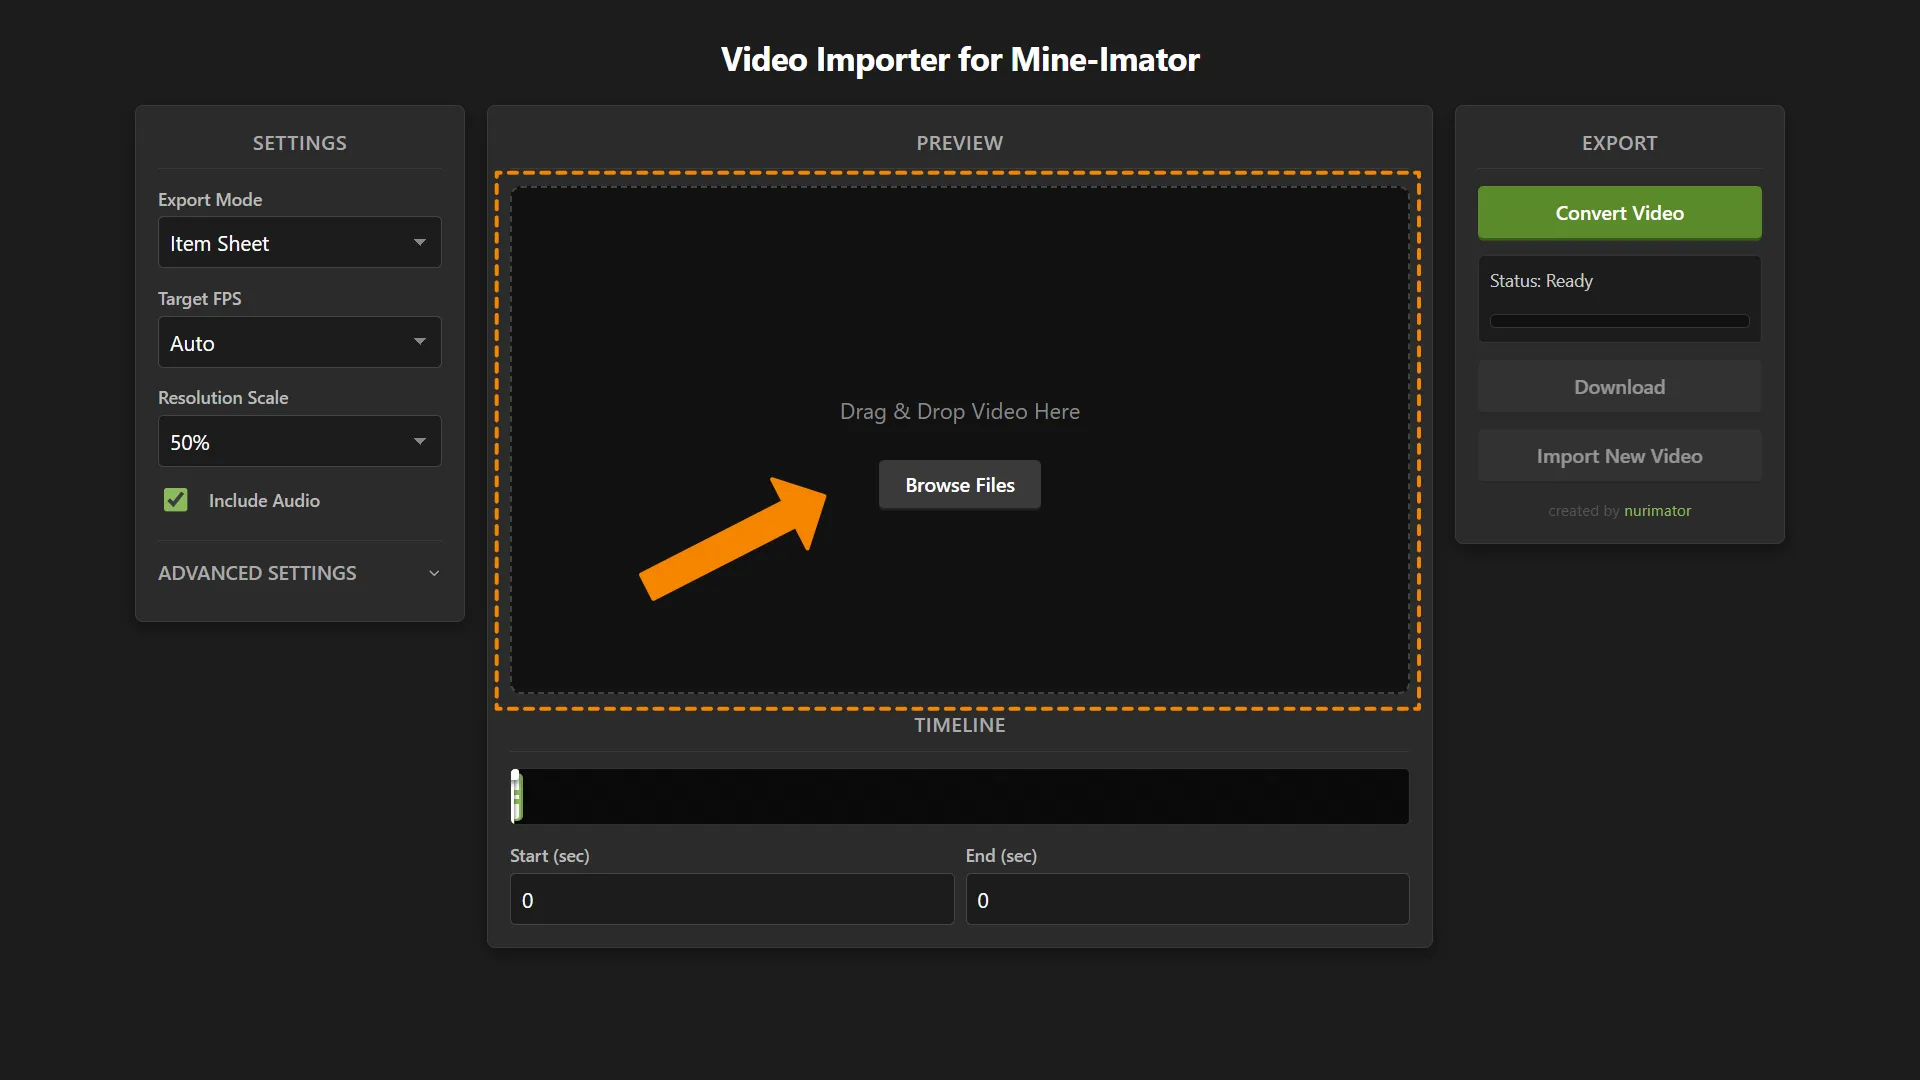
-
Adjusting Video Duration (Optional)
After the video is successfully uploaded, a preview window will appear. If the video is too long, trim the video duration by sliding the timeline bar at the bottom or enter the duration numbers manually according to your needs.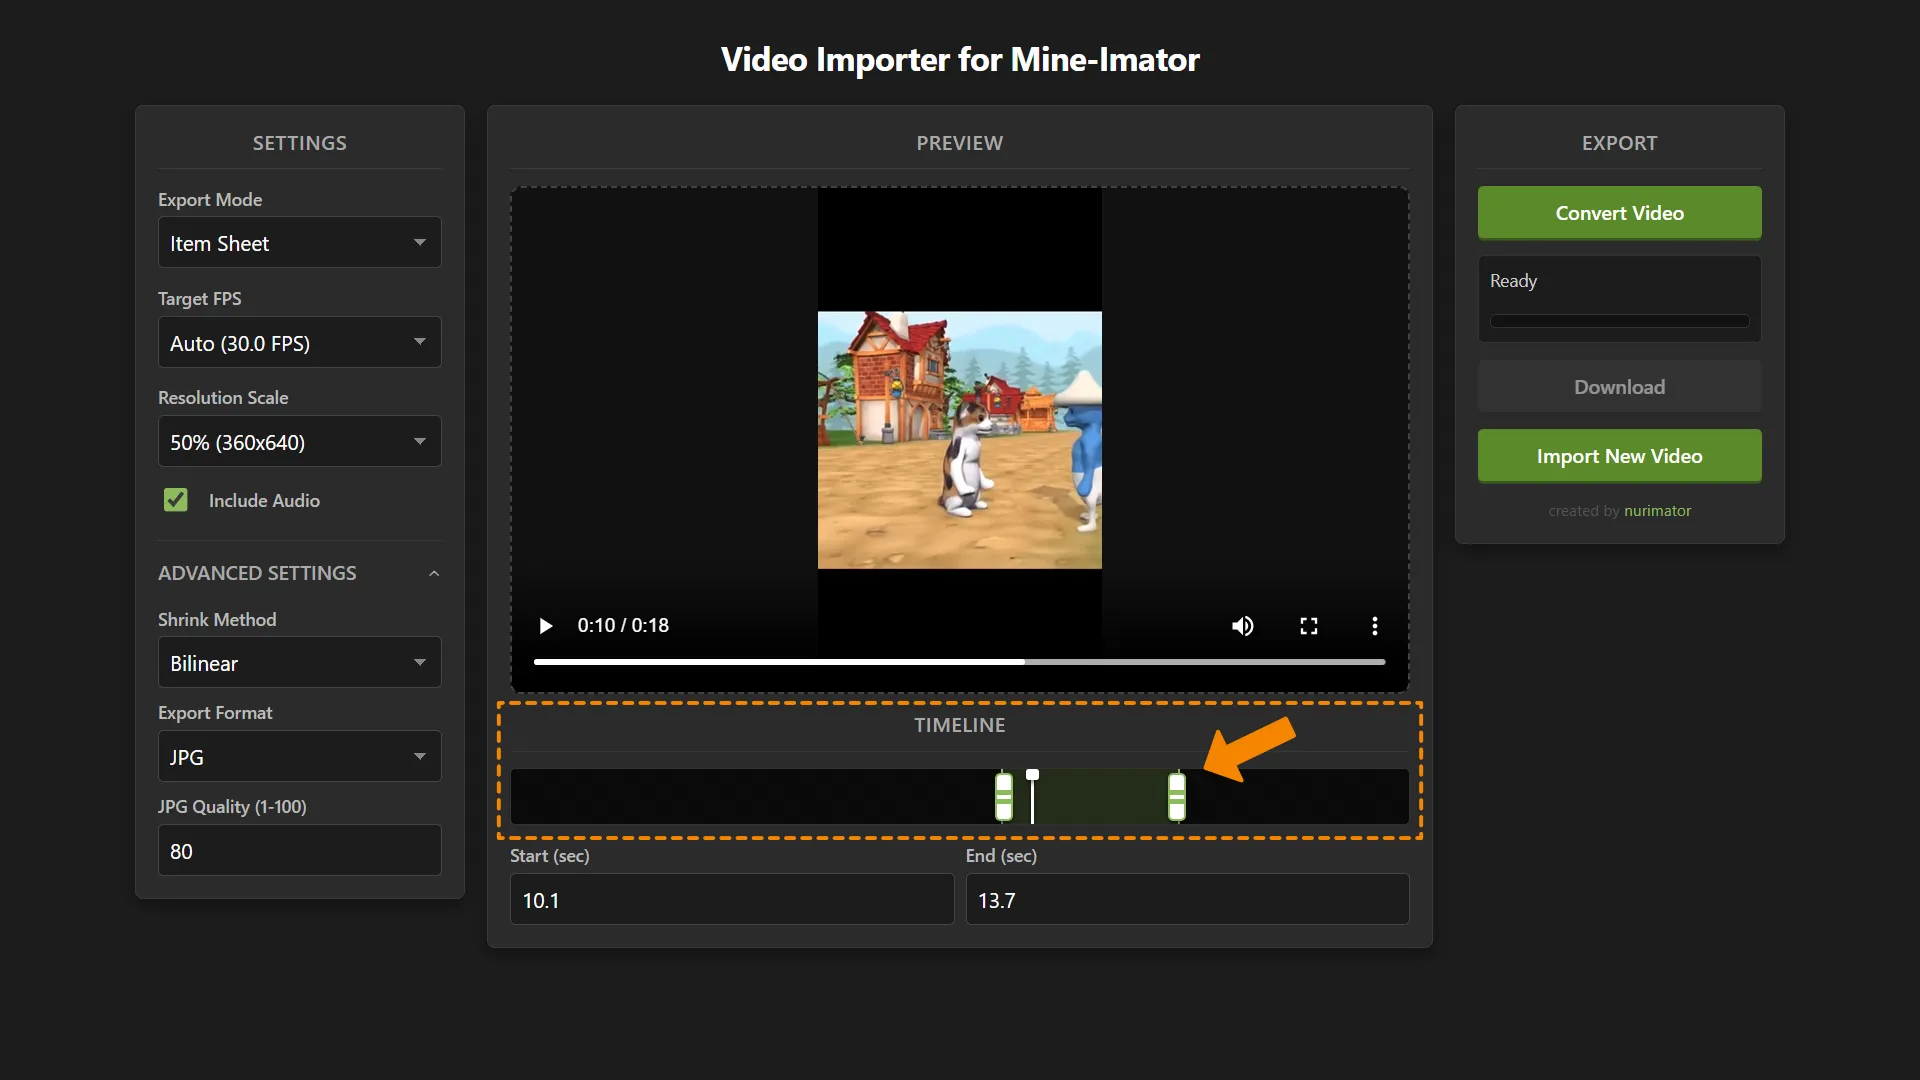
-
Converting & Downloading
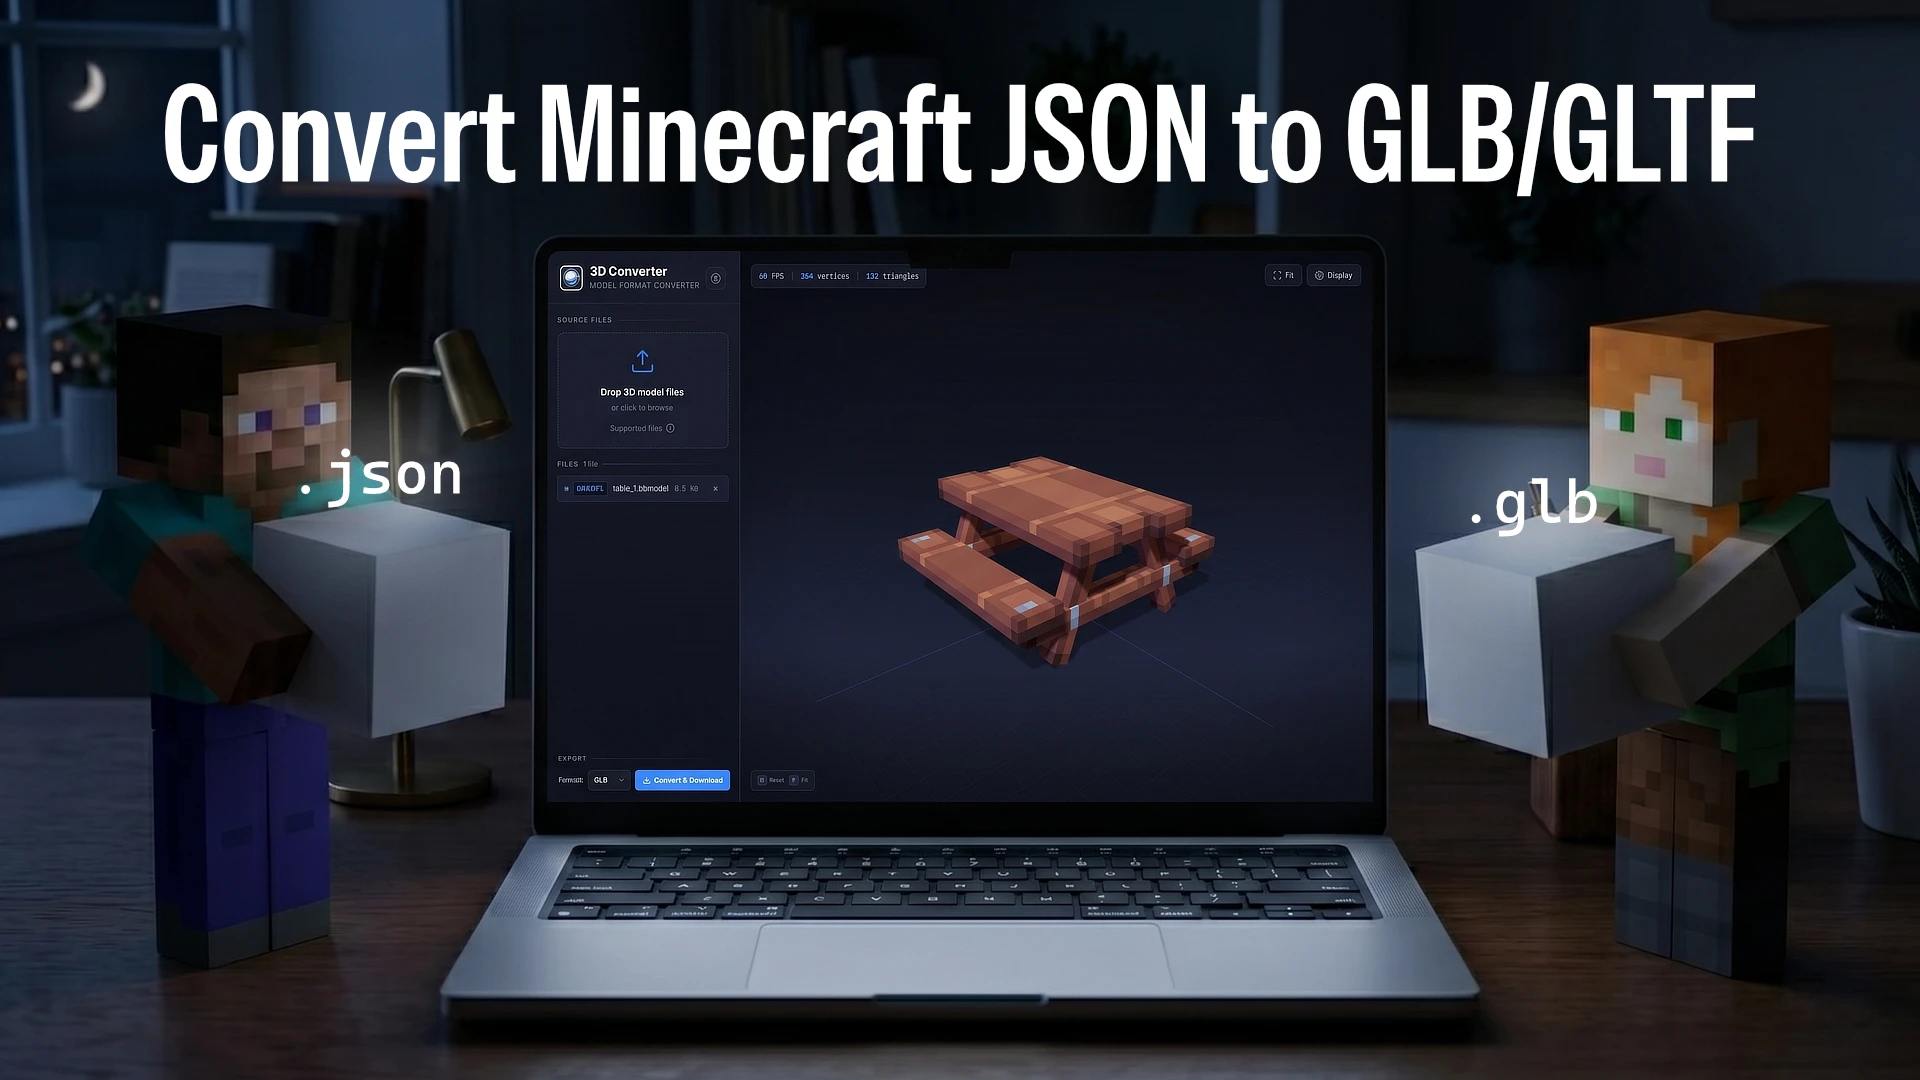
Click the Convert Video button, wait a moment for processing, and then click the Download button to get the converted zip archive.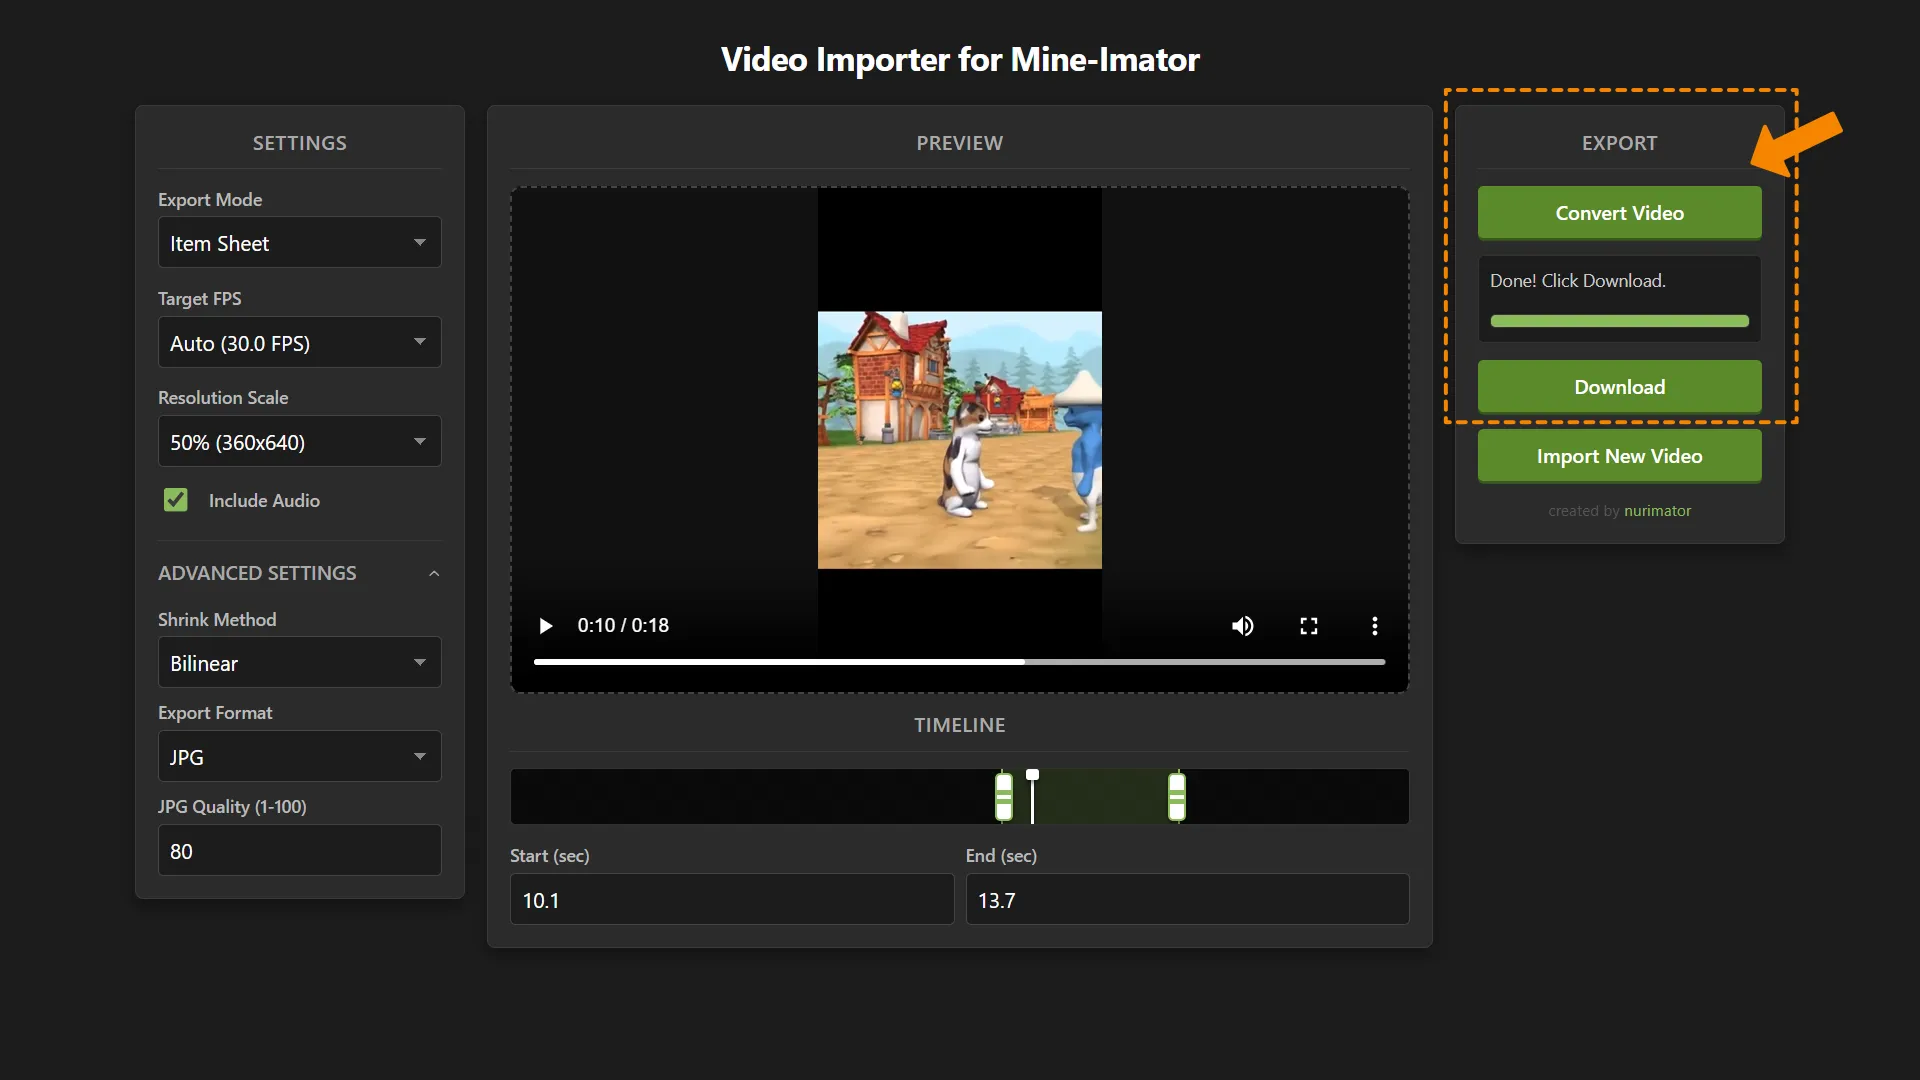
-
Extracting the Zip File
First, extract the zip archive you downloaded. Inside the extracted folder, you will find the main files: an audio file in sound format, an object file in.miobjectformat, and the image(s). -
Importing into Mine-imator
The process of importing these files is straightforward and can be adapted to the version of the application you are using:- For the Latest Mine-imator Versions (2.0 and above)
Open your animation project, then drag and drop the extracted.miobjectfile directly into the application’s main workspace window. - For Legacy Mine-imator Versions (1.2.6 - 1.2.9)
Click the Import button on the application’s top menu bar, then locate and select the file ending in.miobjectfrom your computer’s storage folder.
- For the Latest Mine-imator Versions (2.0 and above)
Once the object is successfully imported, the video will automatically play as a flat object in your animation world. The final step is to adjust its position, scale, and rotation angles according to your animation project’s needs.
Adjusting Video Export Settings (Optional)
In fact, the default settings of the conversion tool are usually more than sufficient for general needs. However, if you wish to adjust them further to optimize performance or appearance, here are the explanations of the available settings:
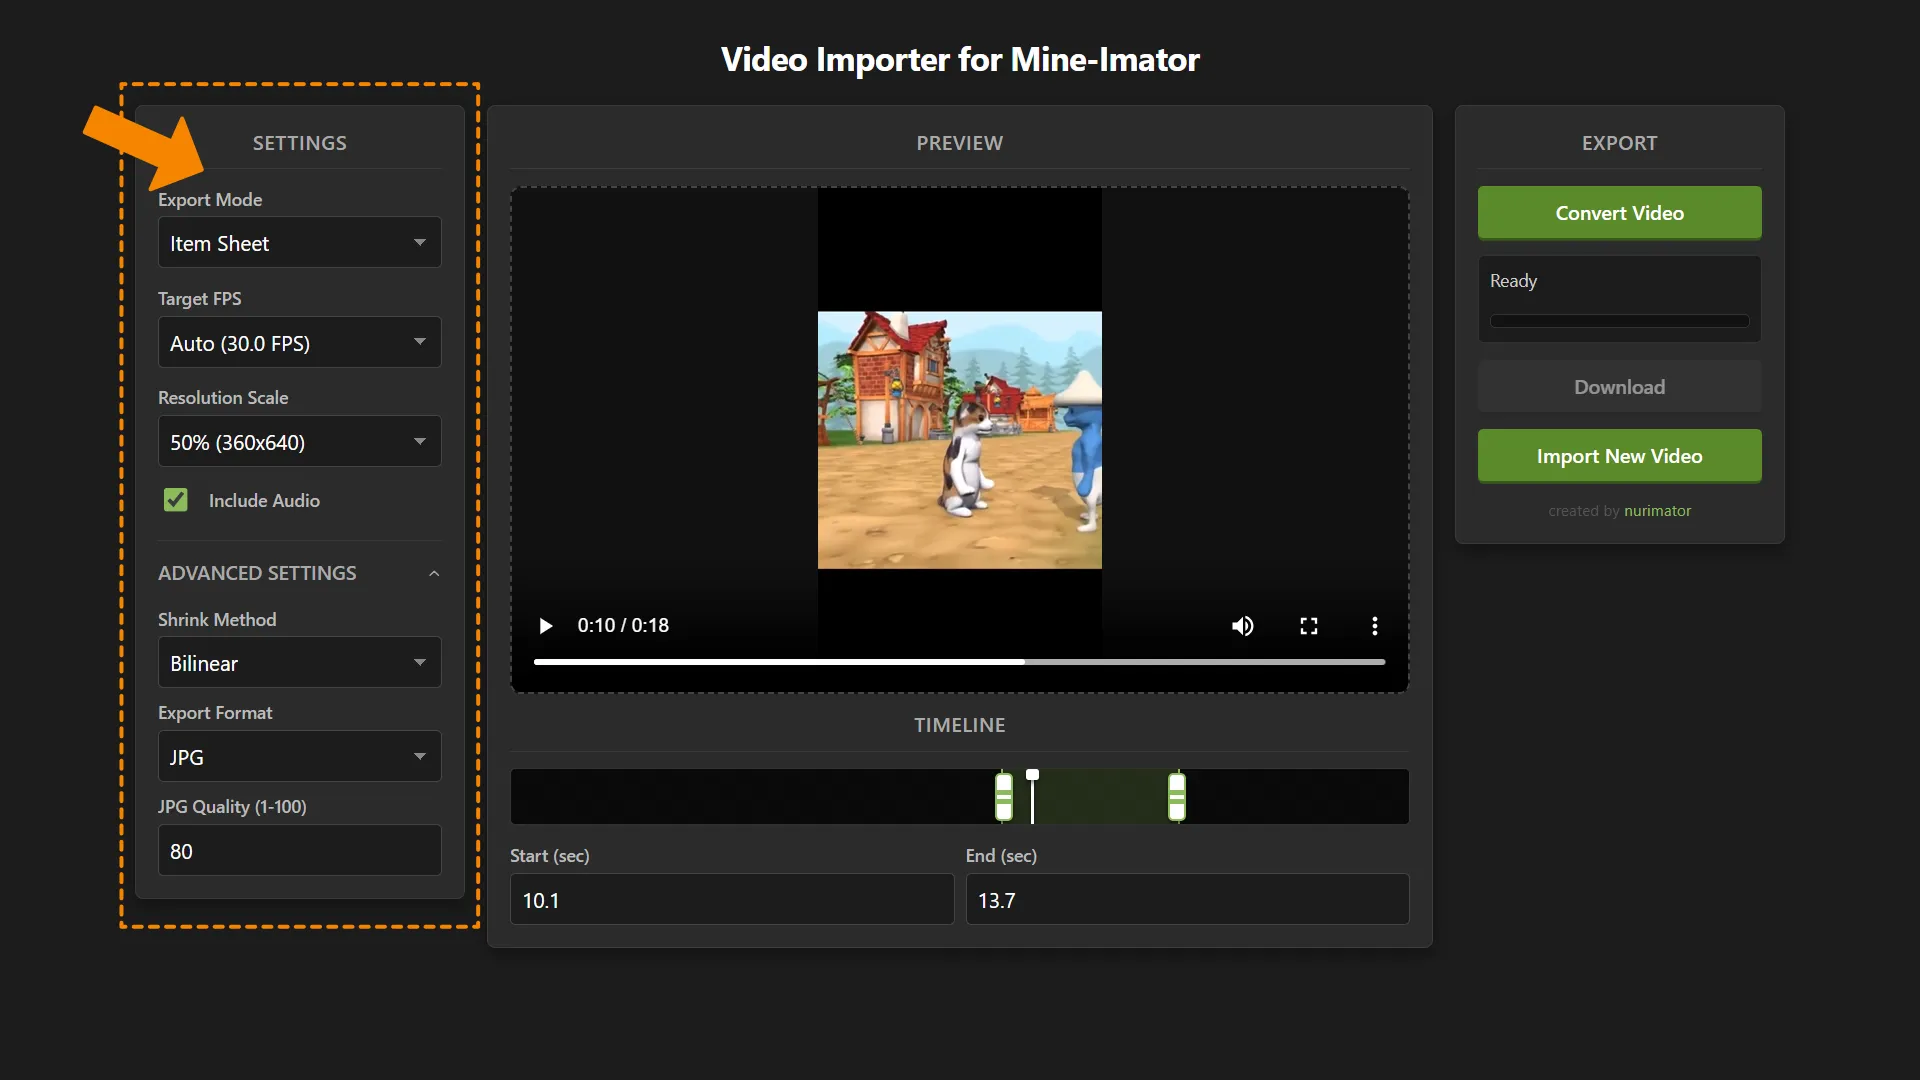
- Selecting Export Mode
Under the export mode options, you will find choices for “Itemsheet” and “Image Sequence”. The itemsheet mode merges all video frames into a single large image, whereas the image sequence mode breaks the video down into hundreds of separate images. It is highly recommended to select itemsheet mode as it is much more practical and avoids cluttering your project folder with thousands of junk files. - Setting Target FPS
The target FPS option determines how smooth the video movement is. Avoid setting the FPS too high because in itemsheet mode, having too many frames will result in an extremely large combined image, which can cause lag in Mine-imator. - Setting Resolution
Similarly to FPS, it is highly recommended to lower the resolution to around fifty percent. Too high a resolution in itemsheet mode will also make the combined image size exceed processing limits, causing the application to lag. - Including the Video’s Original Audio
If your video has audio that you want to include in the animation, check the “Include Audio” box so the system automatically extracts the sound into a separate file. - Advanced Settings
Although it is recommended to leave the Advanced Settings menu at its defaults if you are unfamiliar with the technical aspects of image encoding, this menu offers several extra controls:- Shrink Method
Determines how pixels behave when the resolution is scaled down (e.g., to 50%). Nearest Neighbor results in a pixelated look, which is perfect for maintaining the classic Minecraft pixel style, while Bilinear & Bicubic provide smoother image scaling. - Output Image Format
Offers two choices for the output image format: PNG and JPG. - JPG Quality
If you select the JPG format, an additional quality adjustment option will appear to help you balance visual quality and file size.
- Shrink Method
Frequently Asked Questions (FAQ)
- Why does the video turn into a black screen or fail to export?
Ensure that the browser you are using supports the WebCodecs API, as our web tool utilizes this API to process videos locally on your browser. Almost all modern versions of popular browsers (such as Google Chrome, Microsoft Edge, Firefox(desktop), or Safari) fully support this feature. - Why does Mine-imator lag or crash when importing the .miobject file?
This usually happens because the size of the combined converted image is too large for your computer’s RAM or graphics card to handle. As a first step, try lowering the video resolution, target FPS, or trimming the video duration. However, if your project absolutely requires a long video with high resolution and FPS, switch the export mode to Image Sequence to prevent your computer from being overloaded by a single massive image file.
Conclusion
Applying the method to import video into Mine-imator is now far more practical with the help of a web-based conversion tool. Through simple steps ranging from uploading the video, adjusting the duration and resolution, to importing the final .miobject file, you can bring various screen elements to life in your Minecraft animation world very smoothly across different versions of the application of your choice.